Home lab setup
How I set up my own home lab server: hardware, virtualization and network
In December 2025, I bought a mini PC and used it to set up my own home lab. I had wanted to self-host some of my applications for a while so I could manage my own data and build my own smart home setup.
Hardware
So for Christmas, I got myself a Dell OptiPlex 7040 Mini. The PC has
- an i7-6700T CPU (2.80GHz, 4 cores, 8 threads)
- a 1TB NVMe SSD
- 32GB of DDR4 RAM
These specs are more than enough for what I need. I can comfortably run multiple virtualized applications in parallel, such as Home Assistant, Immich, Traefik, and more. Even Minecraft servers with lots of mods run without any issues.
Operating system and virtualization: Proxmox
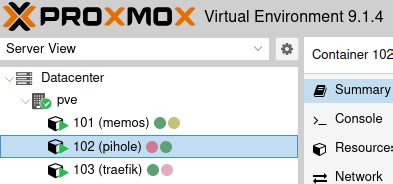
I installed Proxmox on the mini PC so I could run the individual applications in isolation and handle backups more easily. This turned out to be extremely useful because it also makes application setup simpler, keeps management clean and straightforward, and avoids locking everything into a single operating system.
For backups, I bought external HDDs and use Proxmox Backup tools to store backups of the individual LXC containers and VMs.
Network
To make the applications available both locally and from outside my home network, I use a combination of Pi-hole, Traefik, Tailscale, and a rented domain.
Why is any of this necessary?
The VMs and LXC containers you create in Proxmox each get their own IP address. That means the applications running inside them are usually accessed through that IP address plus a port. For example, my Home Assistant web interface is available at http://192.168.178.115:8123.
DNS server
Since it is much more convenient to access applications through proper domain names such as homeassistant.home.arpa, it makes sense to run a local DNS server that translates those domain names into IP addresses. That way, you do not have to remember or type IP addresses all the time. This DNS server can also run on your own home server. You then need to configure the DNS server's IP address in your Wi-Fi router settings so devices on the local network use it and resolve the domain names correctly.
Reverse proxy
However, DNS servers only resolve IP addresses, not IP address and port combinations. If you ran your own DNS server, such as Pi-hole, and mapped 192.168.178.115 to homeassistant.home.arpa, you would still have to enter http://homeassistant.home.arpa:8123 to open Home Assistant. To avoid that, it makes sense to use a reverse proxy such as Traefik.
Requests that are actually meant for the Home Assistant server are first sent to the reverse proxy, which then forwards them to Home Assistant. Because of that, the DNS entry homeassistant.home.arpa no longer needs to point to the Home Assistant IP address. Instead, it should point to the reverse proxy's IP address. The reverse proxy then has to be configured so it forwards requests for homeassistant.home.arpa to http://192.168.178.115:8123. When configured correctly, the reverse proxy can do this not just for Home Assistant, but for any other application running on the server as well.
Encryption with TLS certificates
As you can probably tell from the example URLs, all network traffic up to this point is unencrypted and could be observed by other devices on the local network. In the long run, that is something worth avoiding, because it only takes one compromised device on the network for data to leak unintentionally.
This is where TLS certificates come in, formerly known as SSL certificates. When a user opens a website, for example, the certificate confirms that the site really is the one it claims to be. This mainly relates to the domain name of the site being accessed. If the domain stored in the TLS certificate does not match the domain of the site being opened, the user will see a warning that the site may not be trustworthy. If the certificate matches, the connection between user and server is established and all traffic between them is encrypted so that third parties cannot read it.
So if you want encrypted connections to the applications on your home server, you need TLS certificates that include the domain names of those applications.
Self-signed certificates and paid certificates
There are different ways to get TLS certificates. You can generate them yourself, but most browsers will treat them as untrusted and show a warning when you open the application because the certificates were not issued by a trusted authority. That quickly becomes annoying because you either have to dismiss a warning every time or manually trust every single certificate, which is both inconvenient and easy to get wrong.
Certificates from official certificate authorities, on the other hand, are trusted by most browsers, but they are often expensive because you usually have to pay for each certificate you need.
Let's Encrypt certificates
Fortunately, there are also free certificates from certificate authorities, such as Let's Encrypt. These are trusted by most browsers and can be used at no cost. To get them, however, you need to rent a domain, because Let's Encrypt only issues certificates for publicly registered domains.
Reverse proxies such as Traefik can be configuredto forward requests to applications on the home server while also obtaining and serving the appropriate Let's Encrypt TLS certificates.
This encrypts network traffic to the applications on the home server without requiring you to create and manage each individual TLS certificate yourself.
The home server does not need to be reachable from the public internet for this. The important part is simply that the applications are reachable inside the local network under the rented domain name. For example, if you rented mustermann.de, the reverse proxy would need to make services available under names such as homeassistant.home.mustermann.de, immich.home.mustermann.de, and so on. Let's Encrypt could then issue TLS certificates for those domains.
External access
To make applications on the home server reachable from outside the local network, one option would be to forward ports on the router so outside requests are sent directly to the applications. However, that is not very secure because it exposes those services to attacks from the internet.
A practical and free alternative is Tailscale, a VPN service that lets you securely access applications in your local network from anywhere in the world by creating a secure connection between the device you are using and your home network.
To do that, Tailscale needs to be installed on the home server and run in a way that advertises the local network subnet, for example 192.168.178.0/24, into the Tailscale network. Once Tailscale is also installed on the device you want to access the applications from, it behaves as if you were directly inside the local network. That means the local domain names, reverse proxy, and TLS certificates continue to work exactly the same way.
Final network setup
After a fair bit of trial and error, I settled on the following setup:
Traefik
I use Traefik as my reverse proxy. It runs in an LXC on Proxmox and is configured
- to route requests to the individual services correctly,
- to use my rented domain,
- to generate TLS certificates with Let's Encrypt,
- and to automatically redirect
http://..requests tohttps://...

If I find the time, I'll write a separate post about my Traefik setup and publish the practical Python script I wrote for it.
For example, this is what the configuration for Home Assistant looks like:
http:
  routers:
    ha:
      rule: Host(`ha.home.ejuet.de`)
      entryPoints:
        - websecure
      tls:
        certResolver: le
      service: ha
  services:
    ha:
      loadBalancer:
        servers:
          - url: http://192.168.178.115:8123
Pi-hole
To make sure requests to applications such as homeassistant.home.ejuet.de are routed correctly, I use Pi-hole as my DNS server. For that, I created a file called 06-home-ejuet-de-wildcard.conf in /etc/dnsmasq.d:
address=/home.ejuet.de/192.168.178.67This forwards all requests for domain names ending in .home.ejuet.de to Traefik at the specified IP address.
Domain
I rented the domain through Porkbun, but did not configure anything else there. I only created an API key and stored it in the Traefik LXC so Traefik can generate the TLS certificates correctly.
Tailscale
I created a Tailscale account and installed Tailscale in an LXC on the home server.
First, IP forwarding has to be enabled:
echo 'net.ipv4.ip_forward=1' | tee /etc/sysctl.d/99-tailscale-router.confThen Tailscale can be started with the following command to advertise the subnet:
tailscale up --advertise-routes=192.168.178.0/24The route also has to be approved in the Tailscale admin console.
To keep using Pi-hole as the DNS server, it needs to be configured as the split DNS server in the Tailscale settings:

Conclusion
Setting up your own home lab is not all that difficult if you have a bit of time and patience. It is a great way to explore different technologies while keeping full control over your own data.
My setup with Proxmox, Traefik, Pi-hole, and Tailscale has been running very reliably for quite a while now.
Comments
Feel free to leave your opinion or questions in the comment section below.